
Tutorial |
Making Holes In Straps |
 To Tutorials Main Page
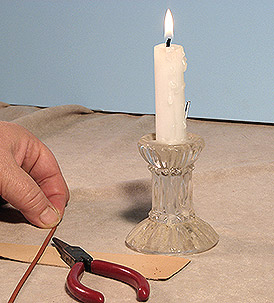
One of the most difficult things to do with scale model tack (and other items) is to make nice holes in tiny leather straps. Here we offer a good method to help you master this skill.
You'll need the following:
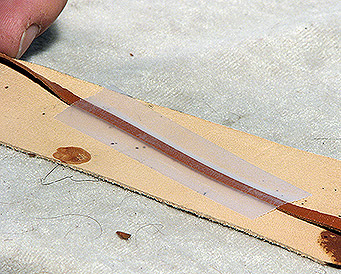
Place the tape on the top (grain) surface of the leather.
Don't press the tape down hard to stick, it just needs to barely stay in place.
The tape will protect the top surface of the leather from soot and scorching.
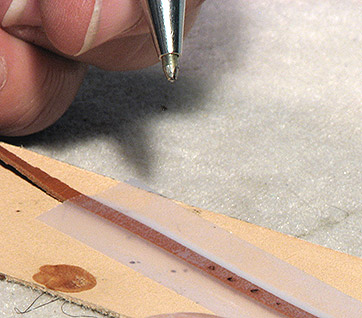
With a pen, pencil or even a sharpie, draw on the tape where you want the holes to be.
This will help you get your holes more evenly spaced, and maybe even better centered.
Place the lace (with tape) on your scrap leather. The scrap can be flesh side up or down.
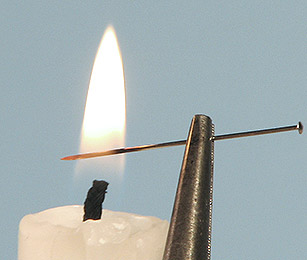
Grasp a pin in the jaws of your pliers. "Serrated jaws" here help to keep the pin from sliding around and will give you a secure hold.
Stick the end of the pin into the flame as shown, and allow it to heat until it starts to glow red. If your pin doesn't want to glow red, either you're using a brass pin, or you need to move the pin higher up on the flame where there may be more heat.
NOTE!— most readily-available stick pins are steel pins. Rio Rondo puts brass pins in our kits, so do not use them for this task... they won't heat up enough to work properly!
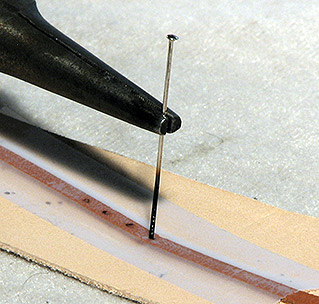
Carefully place the hot pin onto the tape that is covering your leather. Hold your hand steady as just the lightest pressure will practically "melt" right through the leather and into the scrap beneath.
You will have a few seconds before the pin cools to place the tip. Try to keep the pin as vertical as possible. If your pin is too slanted, the hole will be as well, and may make the tongue slant off to one side more than you'd like as well.
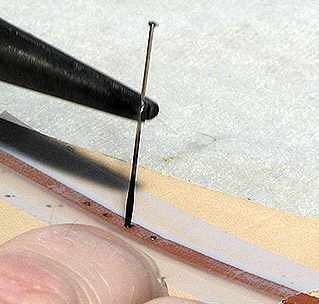
The pin will cool as it passes through the leather, and it will stick into the scrap underneath. You'll need to pull it out and reheat it to make the next hole.
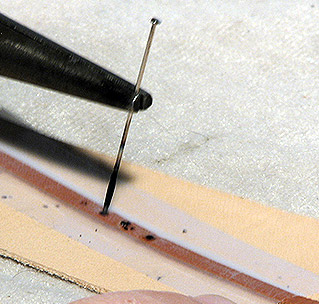
Wipe off accumulated soot with a tissue once the pin has cooled.
A pin will only take a handful of heatings before it gets soft and bendy, so have several pins on hand.
Make all the holes you are needing in a strap, then blow out and quench your candle.
You can try to make holes from the "flesh" side of your leather (for an even cleaner look on the front side), but it can be a little more difficult to end up with the holes looking aligned and centered on the front side.
Practice makes perfect!
Here's the strap showing the holes, before the tape has been removed. Note that the tape is a bit melted and even a little scorched in places.
Clean and Dry your Hands!
You'll probably end up with soot and such on your hands doing this, so be sure they are clean before removing the tape, so you don't leave sooty smudges on the leather.
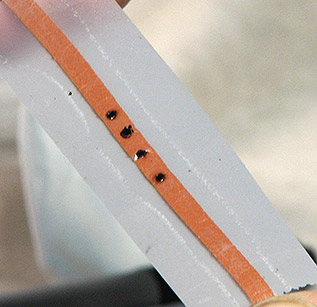
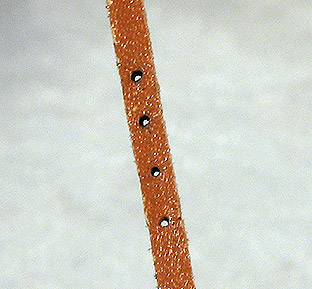
And here you have a nice line of holes!
The rims of the holes are black, because the hot pin actually burned its way through. The tape helps keep the burned soot from the pin, and the leather from sticking so much to the top of the leather, staying on the tape instead.
You want to make sure the tape is lightly applied, so it doesn't leave residue on the leather's surface. This is most important if you're poking holes in bare tooling leather that has yet to be dyed and finished.
Practice will help train your eyes and hand to accurately place the pin exactly where you want the holes.
Planning your project well, will help you best determine where the holes need to be placed on a strap, and how many you might need, not to mention spacing.
It is usually best to do all the holes you need in a strap at the same time, as it can be tricky lining up an extra hole or two, or having them come out the same later.
If you were a little slow to poke a hole and the pin didn't quite go through enough, reheat the pin and try again. It does take some skill to precisely hit the same spot again, and sometimes a second try at a hole results in the hole being bigger than the others. Practice does wonders to help you get it right each and every time.