Rio Rondo offers a selection of small beads that can be threaded onto lace (or embroidery thread) to produce a decorative silver ferruled look.
LEATHERS
- Flat Lace
Larger beads can be threaded onto 1/16" flat lace.
Smaller beads can be used on these laces (however the leather may need special trimming to be thin enough).
- Round Lace
Round lace is available in .5mm diameter and the larger 1mm diameter. All of our beads will fit on the smaller size, but some of them are too small to fit on the larger 1mm size. The width of lace you choose to use for your project should be based on the types of beads you wish to use, the scale of the object, and the finished look you are trying to achieve.
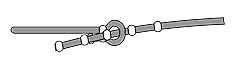
- Other Materials can be used to string beads onto, and then the ends are attached to leather straps on each end. Wire, thread and bead-stringing cord are all possibilities.
TOOLS
A Hobby Knife will prove handy to "skive" a thin layer off the back side of the leather on the starting end so that your beads will thread onto the lacing more easily. An alternative to skiving with a knife, is to use sandpaper to remove a thin layer from the rough or flesh side of the leather.
An awl will prove useful on occasion where you may need to open the hole of a bead a little larger so that it will slide onto the leather easier.
A pair of "crimping pliers", which have a little "cutout" hole in the jaws that serves to compress the bead without truly flattening it may be desirable in some cases. Check your local crafts store or mail-order crafts outlet on this item
A "bead reamer" can be handy to "open up" the holes in smaller beads so that your lace can pass through more easily.
PLAN YOUR PROJECT
You need to know the lengths of each piece, determine how you will attach various pieces together (by gluing tabs, using crimp beads as fasteners,) as well as adjustment areas using either buckles, or a button-and-loop arrangement.
Many times you will find that it is best to build these types of items on the actual model you wish to use it on (or another model body that is of similar proportions so that you don't damage a quality model) and measure as you go, as opposed to going by a "formula" or strict measurement chart.
SPLITTING LACE
This is one trick that any serious tackmaker must find a way to master, or find someone who will do it for them. Splitting lace (such as 3/32" or 1/8" widths) lengthwise (to make it "half-width") allows you not only to thread beads onto the lace, but also offers you far more variety in the type and refinement of items you create.
Alternatively, you can also purchase our 1/16" width lace, or 1mm and .5mm round lace.
I generally use a scissors, and with practice, one can learn to be fairly accurate with that method. At first it is very easy to skew off to one side and end up with lots of short pieces or irregularly cut ones. Keep any shorter pieces handy, as most pieces 1-3" long can eventually be used for some project. Practice makes perfect.
Some people have had better luck using a hobby knife to split the lace. You may wish to try this method as well to see if it will work for you. Be careful though, it is very easy to split yourself instead of the leather with a hobby knife!
EXPERIMENT A LITTLE
Before you get started on your first beading project, you might take a little time to string a few beads onto a strip of lace about 2" long. Of course you don't need practice stringing beads, but what you might wish to do is try out different combinations of beads to achieve different looks.
You can set up a "pattern" or "theme" of bead sequences to achieve very interesting new looks out of fairly simple beads. Alternatively you can use the same type of bead exclusively, either spacing the beads evenly, or arranging them in patterns or groups. The only problem with doing this is that you may end up with way too many ideas you want to use, and not know which one to pick!
START BEADING
- Prepare your leather lace. If it is too thick, you will need to skive it a little thinner so that the lace or other stringing cord will pass through the beads.
- Begin by cutting one end into a taper. The longer and narrower the taper, the easier it will be to thread beads onto the leather. For round lace, you should also skive (or sand) one side of the tapered end down so it is even thinner. This will be important for smaller beads in particular.
- Once you start stringing beads, the tapered tip can get a little limp and frayed. Apply a small dab of glue to the end and let it dry, so that the end is a little harder, and stiff, and easier to thread.
- If this end is an attachment end (to be attached to a bit for example) decide whether you are going to fasten the leather simply by gluing down a tab, or if you are going to use a bead to crimp it in place.
- If you intend to use a bead to crimp the item in place, you will need to skive a layer off the leather (even round lace) first. Skive the round lace on one side so that it is approximately half it's normal thickness.
- Thread a bead onto the lace, then pass the tab through the bit ring. Now, slide the bead back down, and over the tab end. This can take a bit of practice and trial and error to get the leather the right thickness so that both layers will fit inside the bead.
- Once you get your bead in place, crimp it down. Do not crimp so hard that the bead cuts through the leather, but it should be snug enough to hold. The "loop" of leather you just made around the bit ring should be loose enough to allow the leather to slide along the loop, but should not be sloppy.
- You can use a spot of super-glue on either side of the bead to help secure it all in place if you wish.
- If you need to attach a buckle to one end of a strap, be sure to allow ample extra length there. Flat lace can simply be folded over itself into a tab and glued in place around the buckle to secure it.
-
Round lace should be skived so that when it is bent over, the skived flat side will touch itself and then it is easily glued. While you can actually secure this with a bead, likely the bead will get in the way of an adjustment strap on the buckle, and would be covered by that strap in any case. So its probably not worth doing in that case.
- If you are using round lace with a buckle, buckle adjustments generally are going to work best with a small buckle (B7 or B13). If your tab is not thin enough though, the adjustment strap passing through the buckle may not fit.
-
Another problem here is that round lace passing through a buckle like this can look sloppy. This problem can be avoided by splicing the round leather onto a flat strap.
- Take a piece of flat lace of the desired width and cut one end into a taper.
- Skive a thin layer of leather off the back side of the last 1/4" on the tapered end. On the round lace part, skive a thin layer from top side about on the last 1/4" of the piece. This should make a flat area on the top.
- With an x-acto knife, pierce a small vertical slit in the leather piece, about 1/16" long.
- Thread the end of the round lace through the slit on the flat lace from the top side. Pull it through until both pieces line up with each other.
- Apply glue between the layers where they join. (The flat side of the round lace should be glued to the underside of the flat lace.) Make sure both pieces are lined up, then let the glue dry.
- Now you have a flat end tab or strap attached to a piece of round lace. A short piece like this can be a tab to attach to a buckle; a long strap on the matching side of the headstall part can be an adjustment strap.
ADJUSTMENT STRAPS WITHOUT BUCKLES
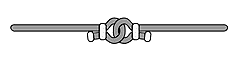
In the old tradition of braided rawhide items, it was typical that a piece of tack would be made with no hardware for fastening, only ingenious methods using rawhide and leather to attach and adjust the pieces. Borrowing from this tradition, you can make a loop and button arrangement using beads. Sure the beads are hardware, but the idea still works.
On a headstall for example, you might choose to put the point of attachment in the poll area, instead of off to the left or right (you can choose to do this any way you wish however, this is only one example)
- Attach one end of the round lace to your bit and thread your beads in place, leaving 3-4 inches extra to work with.
- Use a large round crimp bead (#BD26) to make a slider by GENTLY flattening the bead a little so it becomes an oval shape, rather than round.
- Thread this bead onto your lace, then loop the lace around and thread the end back through. The size of the loop can be adjusted by sliding the bead up or down.
- Arrange the loop and the bead so that the loop will end up about at the center of the poll between the horse's ears when the bit is at the corners of the mouth.
- To keep the sliding bead from sliding off, thread a smaller bead (#BD25) onto the tail end of the lace that is hanging off behind the larger bead.
Crimp this smaller bead tightly into place about 1/2" behind the tip of the loop itself. Trim off the excess length of leather.
-
The slider should be snug enough so that it will only move if you move it, it should not be loose and sliding along the lace on its own. Crimp it just a little tighter if it is too loose.
- For the opposite side, you can make a button attachment, OR another sliding loop.
-
To make another sliding loop, you do the same thing as you did on the first side, EXCEPT you thread the leather through the first loop before threading it back through the slider bead. By sliding the lace through each side, you should be able to adjust the headstall for different models.
- To make a button attachment instead, you simply space out several small beads (3 to 5) along the end of the round lace and crimp each one into place. Each bead will serve as an adjustment marker.
-
Move the slider back a bit to open up the loop, then thread the beaded end through the loop. Snug the slider back in place.
These are just the basics of getting started with creating beaded items. I will advise anyone doing this to begin with very simple projects first. It takes a lot of planning and careful work to work in all the parts that need to be in order and end up with a useful item.
The best piece of advice I can give is to not be too stingy with the leather, particularly round lace. Always cut the pieces you are working with to be an inch or two (or more) longer than you need, on each end, just in case you mess something up, then you can continue without having to start completely over.
Also, avoid fully crimping or gluing beads in place until your project is fully assembled. If you should make a mistake, but have extra length you can move the beads onto, you won't have to start over from scratch.
KEEPING BEADS IN PLACE
- Some beads will fit pretty snug on your leather and go nowhere, while others will slide everywhere and all your careful placement work will be undone immediately. When your projects is assembled, you can choose to either crimp or glue the beads into place.
- For beads that slide very easily, you can move the bead off the desired spot, apply a dab of glue on the spot, then slide the bead back into place.
- For beads that don't slide that easily, but will if you manually move them, you can apply just a touch of glue to one side or the other of the bead to "anchor" it. If possible, place the dab of glue on the backside of the item so it will not be visible. (Reins are difficult because they really don't have a "back side" that won't be seen.)
- Beads can be crimped (or squished) into place using a crimping tool (which will keep the shape mostly round) or with your pliers. If using pliers, keep in mind that the bead will become somewhat flattened, so try to crimp only enough to hold the bead in place, but not so much that the bead flattens out. (unless of course, you are trying to get the bead flat on purpose).
-
When using beads in a sequence, (for example, a round bead, a short plain ferrule and then a round bead) it is only necessary to anchor the beads on the ends, which will in turn, hold the bead(s) between them firmly.
TIP BEADS
Sterling Silver Tip Beads (#BD510s) are very large round silver beads (also available in gold plate) and are the easiest way to get a silver tip onto the end of a flat strap of leather.
- Start by gently crimping down on the bead with the flat portion of the jaws of a pair of needlenose pliers. You should crimp it down just enough to get it slightly oval.
- Check to see that the bead fits over the leather. Once you get the bead to slide on the flat leather (3/32" is best, 1/8" usually needs to be trimmed a bit on the very end to fit), remove the bead.
- Place a little dab of glue on the top and bottom side of the leather where the bead is going to be.
- Now, slide the bead back on and with the smooth part of the pliers, crimp the bead down flat into place and let the glue dry a few minutes.
- Take a pair of cutters and snip the tip end into a taper. Snip right through the metal and the leather under it.
- If you choose to be more creative, you can use a fine bur on your moto-tool, or a scribing tool that will etch a bit of a design on metal and "engrave" or "inscribe" a design, or your initials perhaps, onto the flat surface.
CONCHO BEADS
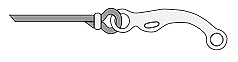
Concho beads have a hole in the middle that allows you to thread them onto a stick pin or head pin. The edge of the bead sticks out around the pin's head, and the result looks like a slightly rounded concho with a decorated edge around it. These are best used for the 6 traditional conchos found on a saddle, but also can be useful for fastening together stirrups or other items.
CAST PEWTER CONCHOS
Our cast conchos come with either one, two or three pegs on the back side for mounting, depending on the type of concho. Oval conchos have 3 prongs on the back side. These can be removed, and the parts simply super-glued into place.
- Three Prong Conchos
If you look at the pegs on the oval conchos, you will notice they are arranged in a triangle. The two pegs on one end can be bent across each other to form a loop. Extra length can be trimmed off and the result is a "bar". The third peg can be trimmed and bent into a little "hook" and thus, the concho is magically transformed into a doll-scale belt buckle, or one very fancy concho/buckle for use on an extravagant halter.
Three-prong conchos can also have the prongs bent so that they hook over the center ring of a breastcollar, making an attractive decoration there.
- Two Prong Conchos
Conchos with two pegs on the back can be used similarly by bending the pegs so they cross over each other to form a "bar", and then they can be attached to browbands easily. Alternatively, for heavier items such as breastcollars, holes can be made in the leather, the pegs passed through the holes and crimped down on the back side for a firm attachment of the item.
CC50, CC51 and CC57 are available with two prongs.
- Single Prong Conchos
Simply make a hole in the leather item, then pass the peg thru and bend it over for a secure fit. All of the non-oval conchos are available with a single prong (some styles with two as noted above).
Because there is only a single peg to hold the part in place, you will need to apply a touch of glue to the back of the concho, to make sure that it does not rotate.
SPECIAL NOTE:
If you will be using the conchos to decorate items on a halter or bridle OTHER than the ends of a browband, its best to snip off the mounting pegs and use super-glue instead. The mounting pegs generally are far too bulky to be used on bridles and halters.
NOTE: do NOT attempt to solder pewter items such as cast conchos or bits over a candle--the items will MELT-- pewter is a very low-temperature metal.
Soldering Castings requires a soldering iron and extreme skill and caution, and is not advisable. Please note that Rio Rondo is not responsible for replacing any items you may modify (or ruin).

 To Reference Main Page