
Tutorial |
Three-Piece Bit Assembly |
 To Tutorials Main Page
Head pins are made of a softer material, and have a larger "head" than a standard stick pin. You can use stickpins if necessary, but they will be more difficult to work with.
The pins will be used to make the Rein Loops.
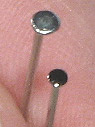
A Head Pin (top) and Stick Pin (bottom) are shown for comparision
Check to see that your pin will fit into the small holes on the ends of the connector, as well as the small holes on the lower ends of the bit shanks.
If the pin will not fit, use a "bead reamer" tool, or a small drill bit, and gently twist it around until the hole is large enough to pass the pin easily.
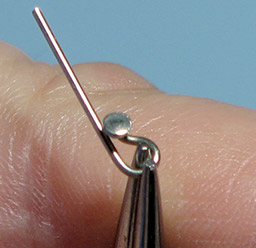
Using a "round-nosed" pliers (also sometimes known as "chain nose" or "rosary" pliers),
make a 90 degree bend as close to the head as practical.
Note: There are 2 variations you can use to bend the Rein Loops.
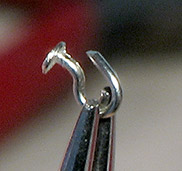
Using the round pliers, bend a loop as small and as even as practical that is in-line with the pin's head.
Using the round pliers, bend a loop as small and as even as practical so that the loop is perpendicular to the pin's head.
Trim the excess length of pin, without closing the loop.
Repeat Steps 2-5 for the second pin.
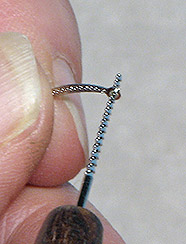
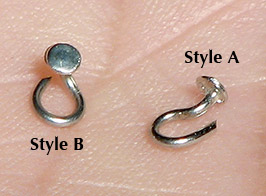
The photo shows the difference between the two types of loops. "Style A" is more common to be found among full-sized bits, however "Style B" may work better in regard to allowing the reins to hang more nicely.
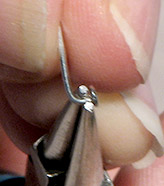
With a pair of "smooth jawed" pliers (the inside surface is plain and smooth, rather than serrated) carefully grasp the bottom end of the bit shank (with the pinhole).
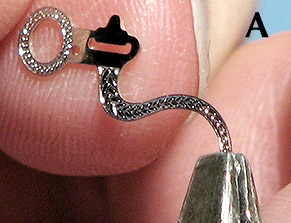
Carefully and gently twist the end of the bit 90 degrees to the side. (You should hold the shank firmly between your fingers just above the loop so that the twist is made just at the very bottom of the shank.)
We recommend that with the front of the bit facing "up" , twist the front part of the loop towards the outer or decorated side.
Repeat this step (but twist in the opposite direction) for the other side.
Make sure that the pinhole is now perpendicular to the bit and faces forward.
Compare both bit shanks to each other and very gently bend the pinhole areas so that they are lined up to the bit and similarly matched to each other.
Slight adjustments to the width that the assembled bit will be can be made by canting these lower pinhole loops a little to the inside or outside.
If you have a model with an exceptionally narrow, or wide mouth, you may need to obtain a narrower or wider connector bar, available separately.
Now things get a bit tricky. You may need to try this once or twice to make sure you get the connector threaded on facing the right direction
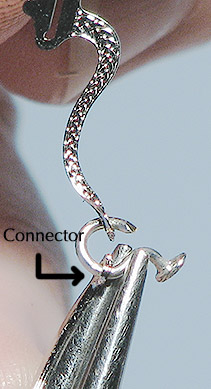
Thread one end of the connector bar onto the Rein Loop. When the connector bar is wiggled all the way down so it rests against the head of the pin, the head of the pin and the decorated side of the connector bar should face the same direction.
If the decoration faces away from the pin head, the connector is threaded on backwards.
This may take a try or two to get right.
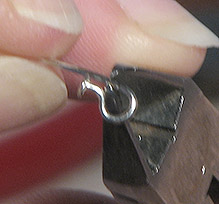
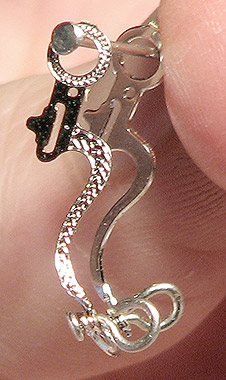
Thread the end of the bit shank onto the pin, behind the connector bar.
Check to see that the bit is facing the proper direction in reference to the connector bar. The bit shank may have been threaded on backwards, or you may have used the wrong side (or both!).
This example shows the LEFT side shank, with the decorated side of the connector facing forward (toward the left) with the loop of the pin facing to the right.
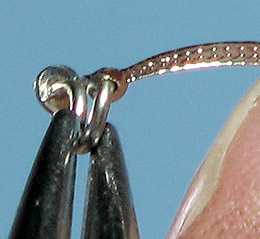
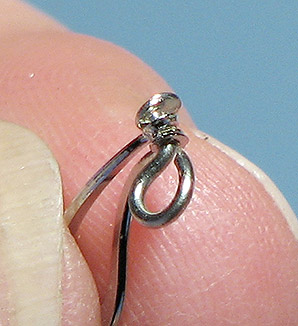
Keeping the two bit parts up against the back of the Pin Head, carefully use small pliers to close the loop, at or just behind the "bend".
This will "lock" both parts into position.
Once the parts are "locked in", you can carefully align the loop or crimp it a little tighter.
Repeat Steps 8-9 for the other side, making sure that:
– the connector bar "droops" toward the bottom
–the connector bar's decoration faces the front of the bit
–the decoration on the shanks face toward the outsides.
If you find that your bit is mis-assembled, it usually is better to snip off the Rein Loop and make a new one, than to try to un-bend the pin (which can cause the bit shank to get bent or damaged.)
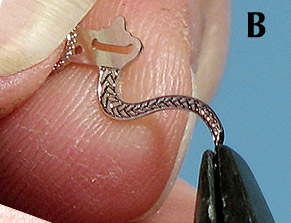
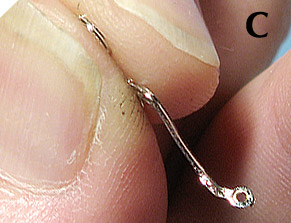
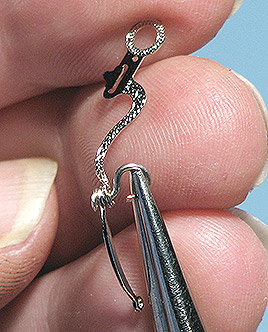
This finished bit sports "Style A" Rein Loops.
Note how the Rein Loops point toward the back side of the bit (or towards the horse).
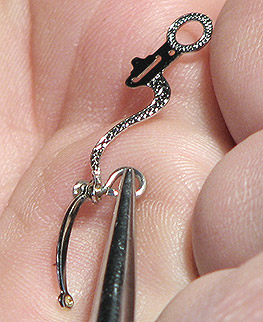
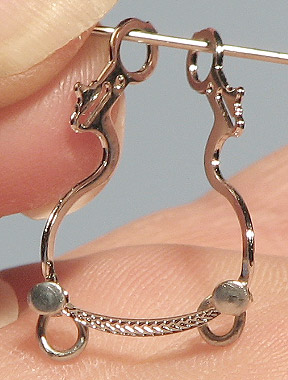
This finished bit sports "Style B" Rein Loops.
Note how the Rein Loops point downwards, or towards the ground, and may be nearly flush against the back of the connector bar.
Once you get past the tricky parts of getting the pieces threaded together properly, the secret to making a nice-looking bit is: