
Tutorial |
Buxton Bit Assembly |
 To Tutorials Main Page
Carefully trim the ends at the location shown.

Take the connector bar, and bend it around a round object such as a pen, pencil, dowel, tool handle, etc.
Don't use an object with flat sides (like some pencils) or you will get "kinks" in your bend.
The amount of bend needed corresponds to how wide you will need the bit to be to fit the horse you'll be putting it on. It can be adjusted after assembly.

Check to see that the connector bar is evenly curved.

Using a small pair of pliers with smooth jaws (serrated jaws can leave unwanted marks on the metal) grasp just the "C-shaped" loop end of one side.

Gently bend the end of the connector as shown.
Then, bend the other side likewise. If you hold the connector up level, the bent ends should be parallel to each other.

Thread the "C" shape end of the connector onto the narrow slot on the bottom of the bit.
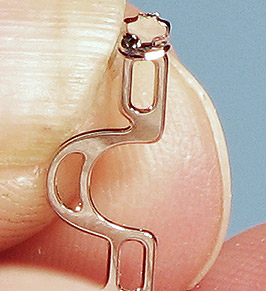
With pliers, very carefully, and gently crimp the two sides of the "C" shaped portion together.
The ends do not need to touch... they only need to be closed enough so that the bit shank will not fall out, but still allows a little "wiggle room" so it can swivel.


Repeat Steps 4 and 5 to attach the other bit shank, and your Buxton Bit is finished!
