
Tutorial |
Crimp-On Strap Tips |
 To Tutorials Main Page
This tutorial covers the "Crimp On" method of attaching strap tips. If your tips break, or you wish to try an alternative, please view the "Glue On" tutorial.
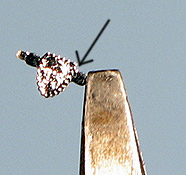
Cut the tips apart, making sure to leave the "tab" on either side.
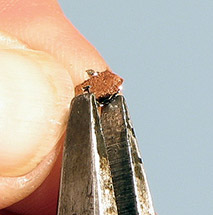
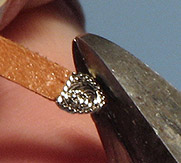
The arrow indicates the location where you will make the first bend... right where the tab meets the body of the Tip.
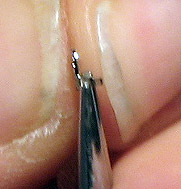
Using a Rosary or Round-Nose Pliers position them where shown in the previous photo.
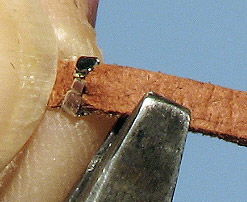
Carefully and gently bend one tab under to about 90° away from the decorated side.
Don't use pliers with a squared nose as these will cause too sharp of a bend, and may break the tab off.
Try to start the bend as close to the body of the clip as possible.
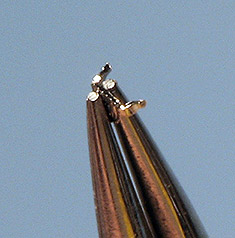
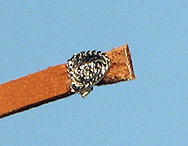
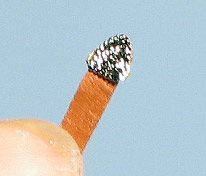
The strap tip should appear as shown.
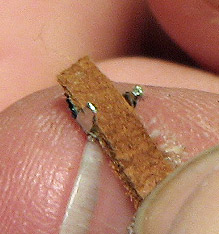
A small dab of any glue (Such as Duco Cement) on the grain (top) side of the leather can help hold the leather in place as you work.
Slide the lace in between the upraised tabs, making sure the top grain side of the leather meets the bottom (undecorated) side of the bit clip.
The lace may be skived, or not. Make sure to use an extra-long piece in case you have trouble.
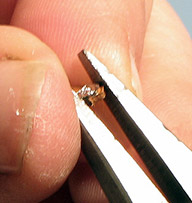
Placing the jaws of the pliers as shown (flat/smooth jawed pliers work best), very gently apply pressure on one tab until it bends and crimps onto the leather. Repeat for the other side. Go slowly! Too much fast pressure can cause the tabs to break.
Very carefully place your pliers over both tabs to gently press them down flat to the leather.
If the tabs still stick up a little bit, carefully place the jaws to cover both tabs together and press them both down.
Your strap with a tip should look more or less like this.
Excess lace can be easily trimmed when you're done.
With flat-jawed pliers, place the jaws to either side of the tip as shown.
Gently add pressure, carefully squeezing from both sides which should help push the tabs in place to be more flush with the leather.
Using your cutters, scissors or a hobby knife, carefully snip or cut off any extra leather that extends past the end of the tip.
Smooth any sharp edges with sandpaper (we recommend 320 grit wet-or-dry paper).
Add a thin liner to the back to cover the tabs. The liner can be any bit of thin leather (even leftover skived pieces from lace) or a bit of paper, to help prevent scratching a model.
It helps to plan your project! Strap tips should be added last, because they are the finishing end touch. Be sure to create your straps extra long at first, and once everything is sized properly, determine where the end of the strap should be (after it is buckled in place) and put it there.
Strap tips are intentionally designed to either be just the width of the lace or a smidge narrower, so you may need to trim (or even sand!) off a little on the edges of the strap. This will allow your strap outfitted with a tip to better pass through a buckle.
This can happen (and we are working on improving the design of the tips to help alleviate this). Meanwhile, you can glue the tips on using the Glue-on Strap Tips method.