
Tutorial |
Glue-On Strap Tips |
 To Tutorials Main Page
This tutorial covers the "Glue On" method of attaching strap tips. If you wish to try an alternative, please view the "Crimp On" tutorial.
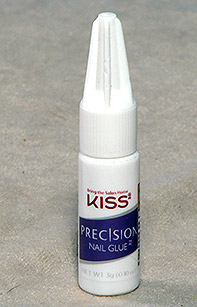
We have found that different brands of super glue may work better or worse than others.
For this tutorial, we used "Kiss2" brand fingernail glue, which worked well.
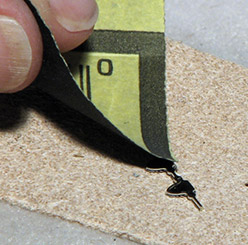
Using a piece of scrap etching frame, you can test your glue to see if it will adhere to the leather (following the basic instructions below).
Sand the back (undecorated) side of the tips. We recommend 320 grit wet-or-dry sandpaper for this. It usually is easier to sand them all together, as the parts are very small. They can also be sanded while still attached to their sheet.
Sand the tips until they appear to no longer be shiny, and have some "tooth" for the glue to adhere to. If you wish, you can sand through the plating and down to the brass base metal.
When your tips are prepped, you can cut them apart. Leave the Tabs on if you can. They can help you line up the tip to the strap.
Place one strap tip decorated side down on the flesh side of a piece of scrap leather. The leather helps the tip to slide around a little less.
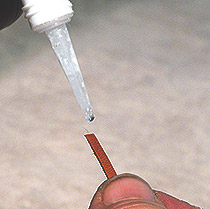
Place just the smallest amount of glue on the top (grain) side of the leather lace, at the end as shown.
The strap can be skived or not.
You can also try sanding the top grain surface of the leather that will be under the tip, to help the glue to adhere.
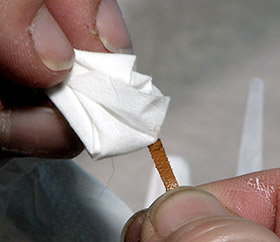
If your super-glue blorps all over the end of the strap, you can dab most of it off with a tissue.
If you end up with an area that's too long and discolored or stiffened by the glue, trim that area back a bit, and carefully apply a little more glue to the area.
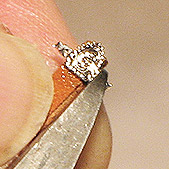
Turn the lace so the top grain (glue) side is down, and line it up over the strap tip. The tapered/pointed end of the tip should face the cut end of the lace.
If the lace extends past the tip, it can be trimmed off later.
You can carefully use a tool (tip of your pliers, tweezers, toothpick, etc.) to press the end of the strap down onto the back of the tip to help set the glue.
Give the glue a moment to set, and then lift the strap. If the tip did not stick to the lace, you may have used too much glue, or not enough. You can try Steps 3 and 4 again.
If you tested your glue, and found that it just will not seem to stick no matter what you try, you probably need to try a different brand of super-glue, or nail glue.
>
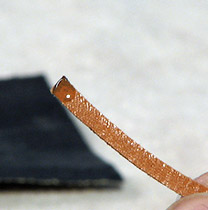
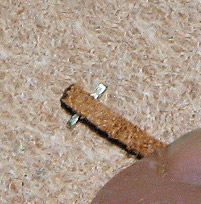
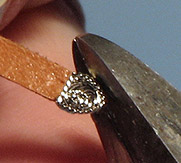
Your strap with a tip should look more or less like this.
Your lace may or may not extend past the end of the tip as shown here
Snip them off with your cutters as close as you can.
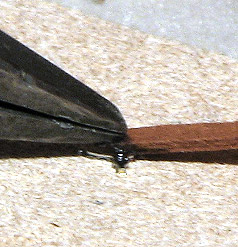
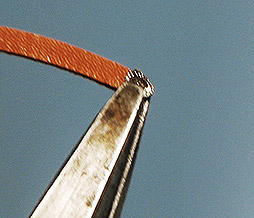
Using flat- or smooth-jawed pliers to hold the tip as shown, you can easily use
sandpaper (or a small needle file) to smooth off any sharp edges.
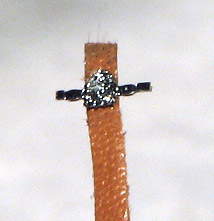
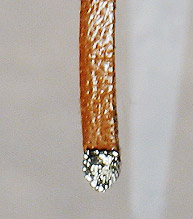
Using your cutters, scissors or a hobby knife, carefully snip or cut off any extra leather that extends past the end of the tip.
You can also use sandpaper to get the leather flush with the tip, if you're having trouble with other methods.
Now that your tip is finished, you can test to be sure it fits through your buckle or a keeper. If it is a little too wide to easily pass, you can use sandpaper or a file to carefully work away a little material from each side until id does.
While the Glue-On method is not quite as secure as the "crimp on" method, successfully crimping a strap tip in place can be a difficult task.
Making sure that you're using a super glue that adheres is the key to making these work — as well as not "picking at" them to see if they will come off!
While crimping tends to be more secure, it can also result in a slightly wider strap tip, that may not be able to pass as easily through buckles or keepers. If necessary, you can carefully sand off the edges of a crimped-on tip, and then set it up for gluing if you wish to.
It helps to plan your project! Strap tips should be added last, because they are the finishing end touch. Be sure to create your straps extra long at first, and once everything is sized properly, determine where the end of the strap should be (after it is buckled in place) and put the tip there, trimming the excess lace afterward.
Strap tips are intentionally designed to either be just the width of the lace or a smidge narrower, so you may need to trim (or even sand!) off a little on the edges of the strap. This will allow your strap outfitted with a tip to better pass through a buckles or keepers.